Make ready setup
This is the stage of the production cycle where final adjustment can be made before printing and or embossing takes place. Below is the process step by step:
Clamp or use die bonding tape to mount the female die onto the chase on the machine.
- Apply double sided tape on the back of the counterforce.
- Ensure the print bed is at its farthest position in relation to the chase.
- Place the counterforce into the die.
- Slowly close the press into the print/embossing position.
- Apply slight pressure to help the counterforce to adhere to the print bed
- Open press so the print bed and so the counterforce separates from the die.
- You are ready to start embossing.
Embossing Registration Systems
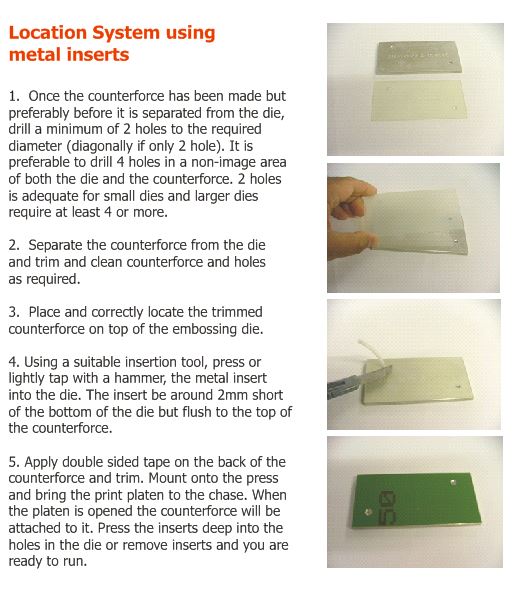
Location System using metal inserts
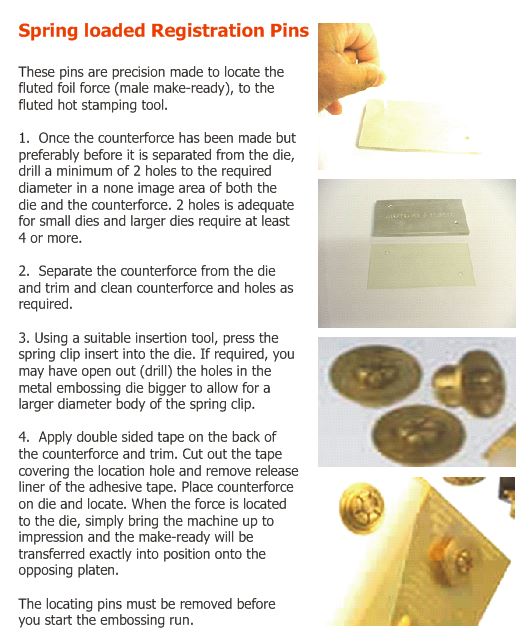
Spring loaded Registration Pins